The Real Secret to Better Bread: Why Your Proofing Bowl Matters
The proofing bowl for bread is where the dough breathes, grows, and turns from a lump of flour and water into something alive. This is where the gluten relaxes, where air pockets form, where flavor deepens.

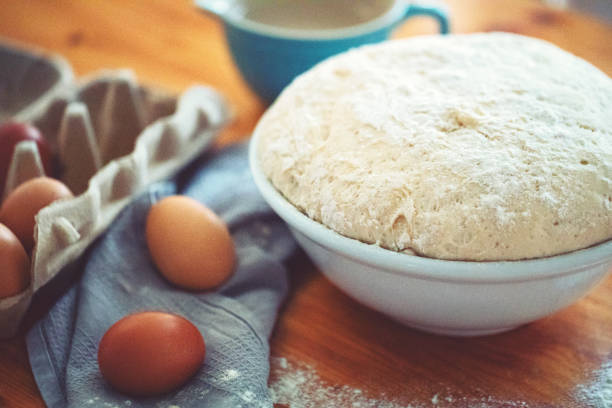
Let’s be honest—most people think the magic of baking bread is in the oven. It’s not. It starts in the proofing bowl. The proofing bowl for bread is where the dough breathes, grows, and turns from a lump of flour and water into something alive. This is where the gluten relaxes, where air pockets form, where flavor deepens. The bowl is the quiet stage before the big show. And if you’re using the wrong one? You’ll taste it. A sticky, collapsed loaf tells you that your setup isn’t right. The right proofing bowl isn’t fancy—it’s functional. It lets the dough rise evenly, stay shaped, and hold its structure when you tip it out to bake. It’s one of those small things that make a huge difference.
Why Every Home Baker Needs a Proofing Bowl
If you’re new to bread making, you might roll your eyes. Another gadget, right? But trust me—this isn’t one of those unnecessary “bread baking supplies” influencers push for likes. A proofing bowl (or banneton, if you’re feeling fancy) keeps your dough supported while it ferments. That means better texture, better crust, and fewer sad, flat loaves. The linen liner helps control moisture, so your dough doesn’t sweat or stick. And the spiral ridges? They give that artisan swirl you see in bakery loaves. Once you use one, you won’t go back to proofing in random salad bowls.
The Science Behind a Proofing Bowl for Bread
Bread dough is alive. It’s full of yeast, bacteria, enzymes—all working together. A good proofing bowl controls that ecosystem. Too warm, the dough overproofs. Too cold, it sleeps. The right bowl balances air and humidity so that your dough develops structure instead of just puffing up and collapsing. That’s the science part. The art part is feel. You start to read the dough. A touch tells you if it’s ready. A proofing bowl gives you that control—the way it breathes, the way it shapes, the way it releases the dough at bake time. It’s a subtle thing, but once you get it, you’ll know.
Choosing the Right Proofing Bowl for Bread
Not all proofing bowls are equal. Some are wood pulp, some are rattan, some are plastic. I’ve used them all. Rattan is my go-to—it’s light, durable, and breathes just right. Plastic is fine if you’re just starting out, but it traps moisture and can make dough sticky. Wood pulp is eco-friendly but delicate. You also want a size that fits your dough. Too small, it’ll overflow. Too big, and it’ll spread flat. A 9-inch bowl is a solid starter for one loaf. For larger batches, 10 or 11 inches. It’s not rocket science—just matching the right tool to your recipe.
Bread Baking Supplies You Actually Need
There’s a lot of noise online about “must-have” bread tools. Ignore half of it. You don’t need a cupboard full of gimmicks. But there are a few bread baking supplies that actually matter. A bench scraper—trust me, it’s worth it. A lame for scoring (a sharp razor works too). A digital scale, because measuring cups lie. And, of course, a good proofing bowl. That’s your foundation. Everything else is flair. If you’re building your baking kit, start simple. Quality over quantity. You’ll learn faster and waste less dough.
How a Proofing Bowl Shapes Your Bread’s Personality
Every baker has a style. Some go rustic and wild. Others like clean, tight crumb loaves. The proofing bowl you use plays into that. The shape of the bowl affects how your dough expands and how the crust bakes. Round bowls give you classic boules. Oval ones make batards—longer loaves, great for slicing. Even the pattern on your bowl can leave a subtle mark on the crust. It’s your bread’s fingerprint. And when you start controlling those details, your bread stops being random and starts being yours.
The Feel of the Dough: Reading the Signs
Here’s the thing no recipe will tell you—you have to feel your dough. You can read about proofing times all day, but your hands will teach you more. A good dough feels airy but not mushy. It holds shape when you press it, springs back just a little. That’s when you know it’s ready for the oven. The proofing bowl gives you that feedback. When you tip the dough out, you’ll see how well it held its shape. Too flat? You overproofed. Too tight? Under. It’s part science, part instinct, and that’s what makes baking bread so addictive.
Cleaning and Caring for Your Proofing Bowl
If you think cleaning your proofing bowl means scrubbing it spotless, stop right there. Don’t. A little flour residue is good. It seasons the bowl, makes it less sticky next time. Just tap out the loose flour after use, let it air dry completely, and store it somewhere cool. If you wash it with soap, it’ll absorb the scent and mess with your dough. You can gently brush it with a dry cloth, that’s it. Treat it like a cast-iron pan—simple care, no overthinking. A well-seasoned proofing bowl will last years, even decades.

The Comfort of Slow Baking
There’s something calming about making bread from scratch. In a world that’s always rushing, bread forces you to slow down. You can’t rush fermentation. You can’t cheat gluten development. A proofing bowl helps you embrace that slow rhythm. While your dough rises, you wait. You breathe. You watch it double, triple in size. It’s humbling, really. You start to appreciate small progress, small changes. And when that loaf finally hits the oven? It’s not just food—it’s a reward for patience.
Building Your Bread Baking Setup at Home
If you’re ready to take baking seriously, build your setup right. You don’t need a commercial kitchen—just the right essentials. Start with a solid proofing bowl, a bench scraper, a good scale, a baking stone or Dutch oven, and quality flour. That’s your home bakery starter pack. Add a clean workspace, maybe a wooden board or marble slab. Keep your ingredients simple. Bread doesn’t care about perfection—it cares about attention. Once your tools are dialed in, your bread will start improving fast.
Common Mistakes When Proofing Bread
Every baker messes up proofing at some point. It’s part of the learning curve. The biggest mistake? Overproofing. You get excited, let it sit too long, and boom—it collapses. Underproofing is another killer. The dough tears, the crumb’s dense, the flavor’s off. The right proofing bowl helps minimize both problems because it shows the dough’s growth more clearly. Mark the bowl, watch the rise. Don’t rely only on time—learn to read the dough. Temperature, humidity, flour—all change the timing. Bread doesn’t follow the clock, it follows the feel.
Bringing It All Together
When you start paying attention to the details—the proofing bowl, the feel of the dough, the few good tools—you start baking with confidence. Bread making becomes less of a guessing game and more of a rhythm you fall into. A proofing bowl for bread might seem small, but it’s a game changer. Pair it with the right bread baking supplies, and you’ll notice a difference in every loaf you pull from the oven. Better rise. Better crust. Better flavor. That’s the goal. And once you’ve tasted that kind of bread, there’s no going back to store-bought loaves again.

FAQs
What is a proofing bowl for bread used for?
A proofing bowl helps dough rise and hold its shape while fermenting. It gives structure, controls moisture, and improves the texture of your bread.
Can I use a regular bowl for proofing dough?
Technically, yes. But a dedicated proofing bowl made of rattan or wood pulp creates a better environment for even fermentation and easy release.
How do I keep dough from sticking to the bowl?
Dust your proofing bowl with flour or use a linen liner. Avoid adding oil—it changes the dough’s surface and can affect crust texture.
How long should bread proof in the bowl?
It depends on your recipe and room temperature, but generally 1–3 hours for most loaves. The dough should roughly double in size.
What other bread baking supplies do I need?
Start simple: a bench scraper, a digital scale, a scoring blade, and a reliable proofing bowl. Add tools as your skills grow.
Ready to bake bread that actually feels homemade?
Start with the right tools. Grab a proofing bowl for bread and the essentials that’ll make your baking smoother, cleaner, and more rewarding. Visit Abioto Baking to get the gear that helps your dough rise—literally and figuratively.