Water Heater Installation and Expert Guide to Electric Water Heater Wiring Installation
Installing a water heater is one of the most essential upgrades for any modern home, providing convenience, comfort, and reliability in daily life. Whether you are setting up a brand-new system or replacing an outdated unit, understanding the process of water heater installation and the details of water heater wiring installation is critical for efficiency and safety. This expert guide will walk you through every important detail—from planning and preparation to electrical wiring—so you can make informed decisions or ensure your hired professional follows best practices.
Why Professional Water Heater Installation Matters
Many homeowners attempt DIY installation to save costs, but a water heater is not just another appliance—it’s a unit that involves plumbing, electrical connections, and safety codes. Incorrect installation can result in:
-
Electrical hazards or fire risks
-
Water leaks leading to property damage
-
Reduced efficiency and higher energy bills
-
Shortened equipment lifespan
By ensuring your water heater installation is done correctly, you not only gain peace of mind but also maximize your investment in the appliance.
Preparing for Water Heater Installation
Before beginning, it’s crucial to evaluate:
-
Type of Water Heater – Decide between tank or tankless, and confirm the size that suits your family’s hot water demand.
-
Location – Choose a safe location with adequate space, ventilation (if gas), and proximity to plumbing lines.
-
Electrical Supply – For electric water heaters, verify your circuit breaker panel can handle the load. Most units require dedicated circuits.
-
Local Codes & Permits – Always check with local authorities regarding permits and safety codes for electric water heater wiring installation.
Step-by-Step Guide to Water Heater Installation
1. Shutting Down Utilities
-
For electric heaters, switch off the breaker.
-
Shut off the main water supply to prevent flooding during installation.
2. Removing the Old Heater
-
Drain the tank completely.
-
Disconnect both plumbing and electrical connections safely.
-
Dispose of the old heater according to local regulations.
3. Positioning the New Unit
-
Place the heater on a stable, level surface.
-
For tank units, ensure at least two feet of clearance around the appliance for maintenance access.
4. Plumbing Connections
-
Attach the cold-water supply line to the inlet.
-
Connect the hot-water outlet line securely.
-
Use Teflon tape and quality fittings to prevent leaks.
5. Pressure Relief Valve & Drainage
-
Install the temperature and pressure relief valve (T&P valve) according to manufacturer guidelines.
-
Attach a discharge pipe leading to a safe drainage point.
Once these steps are completed, the unit is ready for wiring.
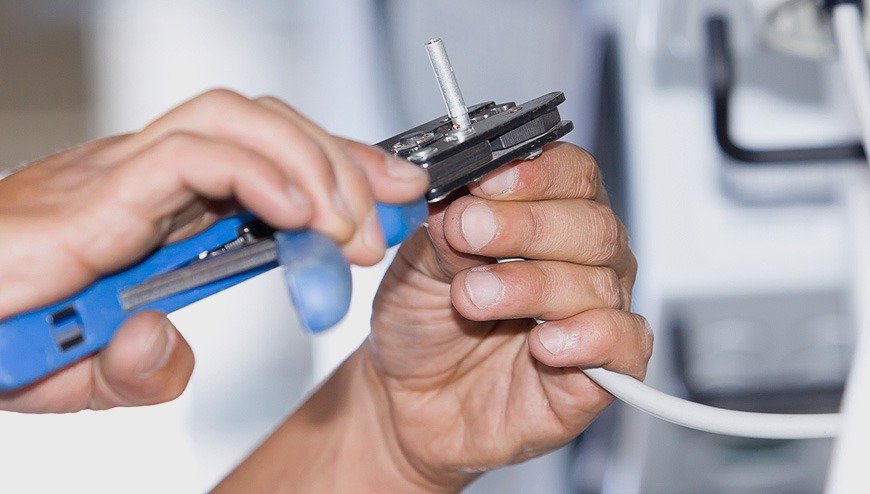
Water Heater Wiring Installation Explained
Wiring is the most sensitive and crucial step in the process. Improper connections can lead to electrical shocks, tripped breakers, or even fire hazards. Here’s what you need to know:
Tools & Materials Required
-
Screwdrivers and wire strippers
-
Voltage tester
-
Approved wire connectors and conduit
-
Electrical tape
-
Dedicated circuit breaker
Electrical Requirements for Electric Water Heaters
Most electric water heaters require:
-
240V dedicated circuit
-
10-gauge or 12-gauge copper wire depending on amperage
-
30-amp double-pole breaker for typical residential units
Step-by-Step Electric Water Heater Wiring Installation
-
Verify Power Supply
Use a voltage tester to confirm that the circuit breaker is OFF before touching any wires. -
Run the Circuit Wiring
-
Route the electrical wire from the breaker panel to the heater’s junction box.
-
Use conduit for protection and to comply with safety codes.
-
-
Grounding
-
Connect the ground wire (green or bare copper) to the grounding screw inside the heater’s junction box.
-
Grounding ensures protection against electrical shocks.
-
-
Connect Hot Wires
-
Strip insulation from the black and red wires.
-
Connect them to the heater’s corresponding terminals, typically labeled L1 and L2.
-
-
Secure Connections
-
Use wire nuts and electrical tape to ensure connections are tight and insulated.
-
Replace the heater’s junction box cover.
-
-
Final Check
-
Fill the tank with water before turning on the power. Running a dry heater can damage the element.
-
Once the tank is full, switch on the breaker and test the unit.
-
Safety Considerations in Electric Water Heater Wiring Installation
-
Never skip grounding—it’s your primary defense against electric shock.
-
Follow NEC (National Electrical Code) standards for wiring size, breaker ratings, and conduit use.
-
Avoid undersized wires, which can overheat and cause fire risks.
-
Use GFCI breakers if your water heater is installed in damp areas like basements.
Benefits of Professional Electric Water Heater Installation
Hiring a licensed electrician or plumber ensures:
-
Compliance with building and safety codes
-
Proper load calculation on your electrical panel
-
Warranty validation (most manufacturers require professional installation)
-
Faster and more efficient setup
Maintenance Tips After Installation
To keep your unit running efficiently:
-
Drain and flush the tank annually to prevent sediment buildup.
-
Inspect wiring connections during maintenance checks.
-
Test the T&P valve regularly for safety.
-
Schedule professional inspections every 2–3 years.
Conclusion
A successful water heater installation is more than just connecting pipes and switching on the power. The water heater wiring installation, especially for electric models, requires precision, adherence to safety codes, and technical expertise. By following best practices—or relying on professionals—you can ensure a safe, efficient, and long-lasting system that provides reliable hot water for years to come.
Whether you’re upgrading your home with a new unit or setting up a system in a newly built property, understanding the essentials of electric water heater wiring installation helps you protect your investment and avoid costly mistakes.